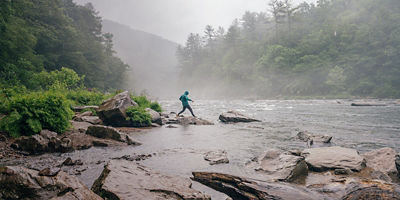
We’re not talking about an ankle-deep stream you can skip across, but rather a deep, swift waterway that might pose a serious hazard. Drowning is one of the biggest risks you’ll face on the trail. So how do you cross one safely? The steps are the same whether you’re staring down a glacial river in Alaska or a rain-swollen creek in the High Sierra: Assess, cross, and (we hope you’ll never need this one) recover. Here are do’s and don’ts—plus green lights and red lights—of safe river crossings.
Assess
You might need to spend a lot more time scouting for a safe crossing than actually crossing the river, but finding the best spot is critical.
DO: Call rangers to check on current conditions and water levels before you leave home. Persistent rain or high snowmelt might have turned normally placid waters into raging torrents.
DON’T: Assume that the trail intersects the river at the safest crossing spot.
DO: Scout upstream and down to find the most favorable conditions.
- Red light: Downstream hazards, such as a waterfall, rocks, rapids, or downed trees that could trap you.
- Green light: Places where the river widens or splits into braids—both reduce the volume of water you’ll have to deal with.
- Green light: Light ripples on the surface, which indicate shallower water.
DO: Check the water’s depth and speed, starting from shore.
- Red light: You throw a rock into the river and it makes a thunky “ka-ploop” sound, which indicates deep water.
- Red light: You toss a stick into the river to judge the current’s speed, and you can’t keep up with it, walking along the shore.
- Green light: The rock doesn’t make a loud sound and you can walk as fast as the stick is moving.
DO: Wade in a bit to test depth and current force.
- Green light: The water is below your knees (or the knees of the smallest member of your party).
- Red light: The water is at or above your knees, especially if it’s moving fast.
- Yellow light: You’re not quite sure if you can handle the water. If so, DON’T attempt to cross here. Continue scouting for a better place to get your feet wet. If you can’t find anything better, DO turn back. The river will still be there when conditions improve.