How to Build an Equalized Gear Anchor

Photo: Esalienko

Expand your climbing potential with this key anchor-building skill.

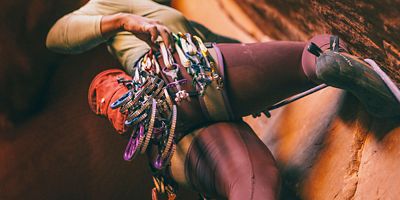
Learning how to build equalized gear anchors is one of the first and most important steps for a budding trad climber. Basically, a gear anchor is a handful of pieces of protection placed in the rock and strung together with webbing or cord. When an anchor is “equalized,” that means the weight of a hanging climber will be evenly distributed between each piece.

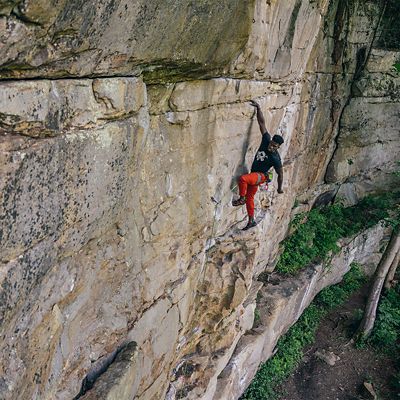
Gear anchors are handy for setting up topropes in terrain where bolted anchors aren’t available and also for building ground anchors to protect lightweight climbers from getting launched upward if their heavier partner falls. But they’re most commonly used for belaying on multipitch trad routes. Most multipitch climbs have recommended anchor-building spots where a ledge provides a comfortable stance. However, the beauty of gear anchors is that you can build them anywhere you can find good cracks and solid gear placements, letting you split up the pitches however you please.

Anchor building is as much an art as it is a science, and you can spend a lifetime nerding out about the detailed physics, material advantages, and clever variations that go into it. (Some climbers go so far as to save photos of anchors they’re particularly proud of.) But you don’t have to get that deep to build safe, solid anchors that will work in a variety of scenarios. 

In this guide, we’ll cover one of the most common and versatile styles of gear anchor: The equalized cordelette anchor. We’ll also refresh your memory on some anchor basics.

Contents

  1. Anatomy of an anchor
  2. Qualities of a good anchor
  3. How to build an equalized cordelette anchor 

Anatomy of an Anchor

Anchor Points

The actual protection connecting your anchor to the rock—in this case, pieces of trad gear.

Leg

A length of soft material, often cordelette, connecting each anchor point to the masterpoint.

Masterpoint

The loop at the center of the anchor that the climber clips into and belays off of. Tugging on this loop puts equal force on all the anchor points in the system. In a cordelette anchor, the loop is usually created by an overhand knot on a bight.

Qualities of a Good Anchor

You’ll hear climbers describe good gear anchors as “SERENE,” though the real acronym that guides and instructors like to use is “SERENA” or “SERENE-A.” It can be handy to run through each letter after you build an anchor to check your work.

  • The anchor should be strong enough to hold a fall from a heavy climber.
  • It should ensure the load is equalized, or evenly distributed between all the anchor points in the system. In other words, when the anchor is loaded, all legs should come taut at once.
  • It should have redundant elements in case one piece of gear or leg fails.
  • It should be simple, efficient to set up, and easy to double-check.
  • There should be no extension or sudden shock-loading if one element fails.
  • The anchor’s legs should form angles that are less than 60 degrees to one another, which minimizes dangerous loading on your anchor points.

How to Build an Equalized Cordelette Anchor

1. Find a good stance.

While good placements should always be your first priority, it helps to look for a big ledge from which to build your anchor. You might be here a while, so make sure it’s comfortable. (Your belayer will thank you, too.)

2. Place a piece.

Even if you’re standing on a big ledge, clip yourself into a solid piece of protection before you start building an anchor. The last thing you want to do is get hurt because you lost your balance fiddling with a tricky stopper.

3. Look for good gear placements.

An anchor is only as strong as its anchor points. Search for good cracks in high-quality rock that’s fully attached to the mountain—avoid detached blocks, crumbling rock, hollow flakes, and other suspect features. If you have to, look high—a move or two off the ledge if need be—and to the sides. You can always clip a long draw to a cam that’s way above your head to make it easier to join up to the rest of an anchor.

Keep in mind that you’ll want to connect each of your pieces with legs at angles of 60 degrees or less. You’ll also want the masterpoint to end up right around face or chest level if possible, which will make it much easier to belay. Take your time to find the right placements that meet these criteria.

4. Place at least three pieces.

You should already have one good piece—the one you’re clipped to. Try to place two more, and use at least two separate cracks if you can. (This is the “redundancy” part of the SERENE-A acronym.)

Not sure if three pieces is enough? Here’s a helpful rule: Every time you place a piece, give it a grade between 1 and 10. A 10/10 piece is a textbook placement: a cam that fits perfectly in a parallel, hand-size crack, or a large nut that’s perfectly flush on all sides and guarded by multiple constrictions. Your minimum goal is a 30-point anchor. If you can get three 10/10 pieces, great! If your third piece is a 5/10, place a fourth that’s 5/10 or better, and you’ve still got your 30 points.

Make sure each piece can resist load from both below, in case the follower falls coming up the most recent pitch, and above, in case the leader falls on the next pitch.

5. Connect the pieces.

Grab your cordelette (you’ll need about a 20-foot section tied into a loop with a double fisherman’s knot). Clip the cordelette to the carabiner on each piece of gear. Make sure the double fisherman’s knot is tucked right up against one of the carabiners so that it’s out of the way for later. When that’s done, you should have a big U of slack cordelette hanging around your feet.

Now pinch the sections of cordelette between your pieces of gear and pull them down toward the center of that U. If you have three pieces, you’ll be pulling down on two sections and will see three separate legs emerge—one running down from each piece—and three separate U’s meeting together at the bottom.

6. Ensure directionality.

Figure out which direction you’ll be belaying your climber from. If they’ll be coming straight up the cliff, tug straight down to bring your U’s together at the bottom. If they’ll be coming up from your left, milk the lengths of cord until all the U’s are pointing to the left. This ensures that if your climber falls, all the legs will come taut at once, distributing the force of the fall among your pieces equally.

7. Tie your masterpoint.

When you’ve got the U’s of your cordelette pointed in the direction of your follower, pinch them together into a bight and tie them all into an overhand knot. The loop made by this knot is your masterpoint. 

Clip yourself in directly to the masterpoint with your personal tether or by clove-hitching your end of the rope to a locking carabiner. When you’re 100-percent certain that your anchor follows all the principles of SERENA and that you are secured to the masterpoint with a locked carabiner, you can go off belay and begin to bring up your follower. 

Note: Performing these techniques incorrectly can be extremely dangerous. Always practice technical rope skills supervised by a professional in a safe environment before attempting them off the ground. No article about such skills should be considered a substitute for instruction from a qualified guide or instructor.

All articles are for general informational purposes.  Each individual’s needs, preferences, goals and abilities may vary.  Be sure to obtain all appropriate training, expert supervision and/or medical advice before engaging in strenuous or potentially hazardous activity.

MORE STORIES