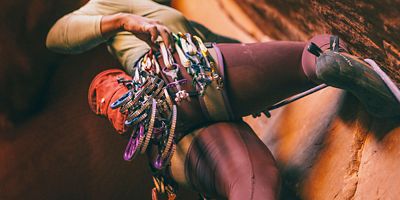
The lowly climbing nut is proof that there’s not just beauty in simplicity; there’s safety, too. This small yet essential piece of traditional “trad” climbing equipment is built to be slotted into constrictions in cracks. And while nuts have come a long way in the past few decades, they’re not too far from their original form: a tapered chunk of metal threaded with cable or cord. It’s a simple and effective design, and the reason that climbers have relied on them for the better part of 70 years. The only caveat? Climbing nuts—and hexes, tricams, and other offshoots—only work if they’re placed correctly. This guide will help you understand how passive protection works and what to look for in a good placement. Here’s all that’s covered:
- What is passive climbing protection?
- The benefits of passive pro
- What makes a good placement?
- Placing offset nuts
- Placing hexes
- Placing Tricams
What Is Passive Climbing Protection?
Climbing protection, or “pro” for short, is any kind of removable gear that you slot into the rock to catch a fall. “Passive pro” is a subcategory that includes climbing nuts or stoppers, hexes, and Tricams—basically anything designed to catch you by wedging itself in place in the event of a fall. Because these wedges don’t utilize springs or moving parts to actively redistribute the force created by a fall, they’re considered “passive.” Modern spring-loaded camming devices, on the other hand, are considered “active pro.”
The Benefits of Passive Pro
Nuts and hexes were among the first kinds of removable protection ever used. As such, they can feel old-school. They also take longer to place and remove. However, the benefits abound:
- Passive pro can be more reliable than active pro in small or flared placements.
- Nuts and hexes are often easier to evaluate for security than cams.
- With no moving parts to maintain, most passive pro is durable and hard to break.
- Nuts and Tricams are compact and easy to carry on a harness.
- Most passive pro is relatively lightweight.
- Passive pro is less expensive than active pro.
What Makes a Good Placement?
Passive protection is easy to inspect and straightforward to place—provided you know what you’re looking for.
Don’t: Make placements in low-quality rock. Because of its strength and simplicity, passive pro rarely fails when placed correctly. The exception: When the rock surrounding your piece is flaking, crumbling, or detached from the cliffside. Your pro could shear through it—or pull off a block or flake—in the event of a fall. Always inspect the rock before placing pro.
Do: Set passive pro above constrictions. Look for a bottleneck or pinch in a crack (bonus points if it pinches in an outward direction, too), and wedge your gear into the notch above it. Hexes and Tricams can be placed so that they create a slight camming action, which allows them to work in more gentle constrictions. However, a perfectly parallel-sided crack is going to be a tough fit for most passive pro.
Do: Look for a match-fit. The geometry of the nut or hex should exactly match that of the bottleneck: The rock should be flush against both sides of your gear, and it should be completely encased within the crack with no edges sticking out. The more surface contact, the less likely the nut will be plucked from the crack by outward force.
Don’t: Make endwise placements if you can avoid it. It is possible to place a nut endwise, with its narrow sides wedged against the walls of the crack and its broad side facing out. This can be a good solution in shallow cracks, but it’s less stable than a traditional placement. If you must use an endwise placement, be sure to achieve flush surface contact with both sides of the nut to maximize holding power.
Do: Set the piece in the direction of pull. Always set any piece of pro such that the stem, sling, or wire is pointing in the direction of a potential fall. If you do the opposite and, say, set a stopper in a horizontal constriction and then take a vertical fall, you’re likely to wrench the piece out of place.
Don’t: Forget to extend the piece. Passive pro can wiggle out of place over time due to the natural movement of the rope. Always add a quickdraw—or, better yet, an extended alpine draw—to the piece’s wire or sling to distance it from the rope.
Don’t: Forget about your follower. It’s smart to give a stopper or hex a quick downward tug to lodge it in place. But yank too hard, and it’ll be very difficult to remove. (Always make sure your follower is carrying a nut tool just in case.)