Best Fall Foliage Hikes in Charlottesville
Western Virginia’s fall foliage is second to none. Here’s where to see it.
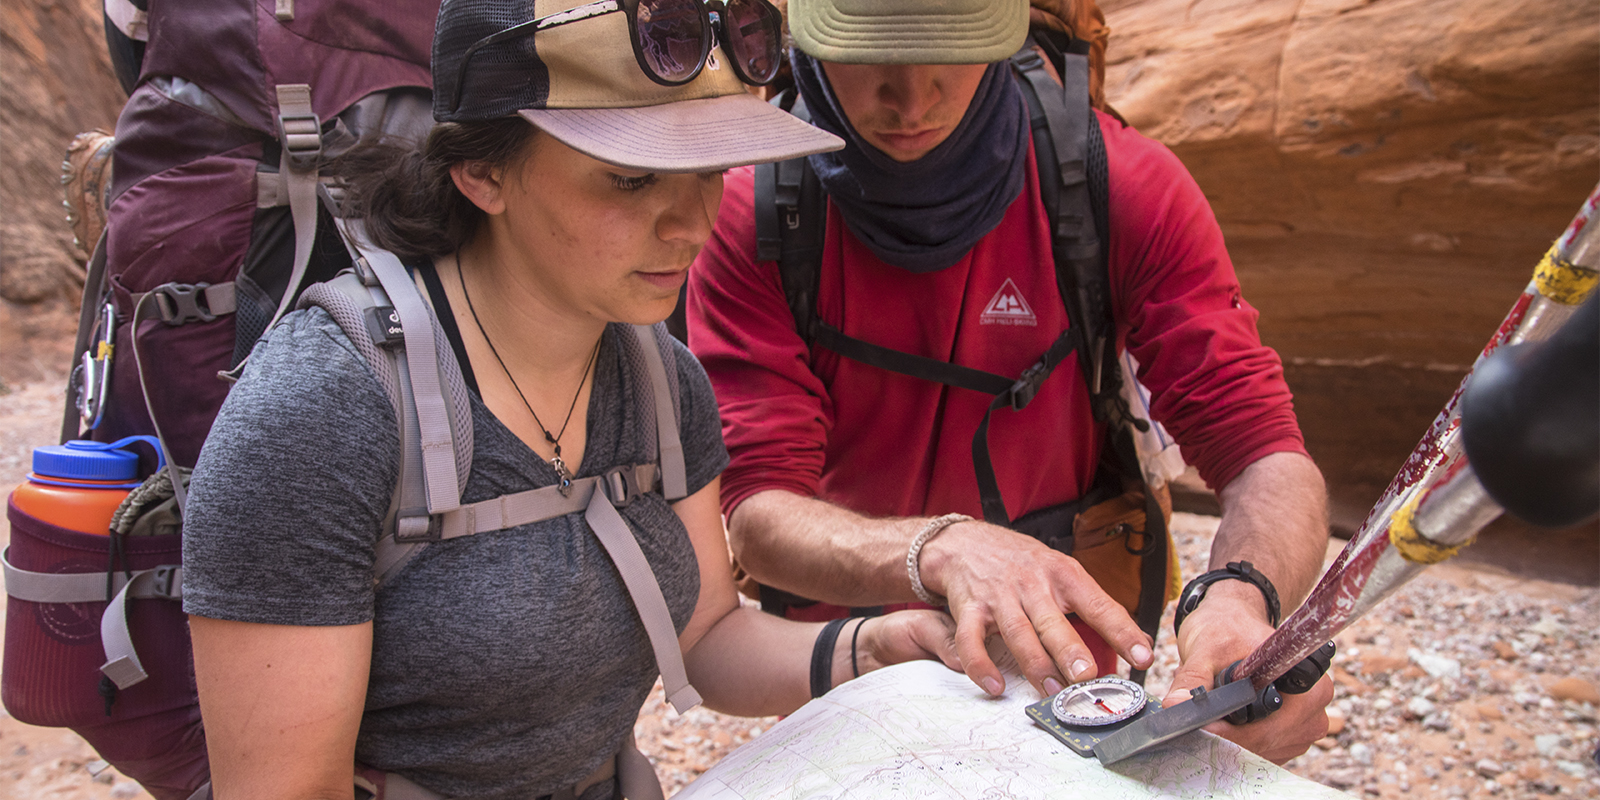
Yes, we love GPS technology too, but a phone app doesn’t mean you shouldn’t know how to read a topo map. A map won’t lose a signal or run out of power in the cold, and it won’t break if you drop it. Plus, unfolding and reading a large map can inspire new adventures in ways that a small screen can’t replicate. Here’s how to get started.
For backcountry travel, you want a Topographic map (topo for short). Topo maps have contour lines that show elevation, letting you “see” 3D terrain on 2D paper. They also display a wide range of natural and man-made features: all types of water (oceans, lakes, rivers, streams, springs, snowfields, and glaciers) and geographic features like valleys, ridges, and mountain summits. You’ll also find trails, paved and unpaved roads, railroads, and towns.
Here are the key features you need to understand to read a topo map:
Scale represents the relative distance of the map to real life, and it’s important for two reasons. First, it lets you calculate distances from one point to another. Second, it determines how much land is shown on the map.
So a scale of 1:24,000, for example, means that 1 inch on the map is equivalent to 24,000 inches (.38 mile) on the ground. That’s a great scale for showing detail, like gullies and small cliffs, and it’s commonly used for USGS topos. But the area shown is relatively small, so you might need more maps to cover the region you’re hiking. A scale of 1:63,000 would show less detail but more area. The right scale depends on your plans. Navigating off-trail? You want more detail. Hiking a well-marked trail system? A map that shows a larger area will be more efficient.
The scale on your map is displayed in the map legend. It usually shows the ratio of map inches to real ground distance, and the first number (map inches) is always 1. The legend will have a ruler-like graphic that converts an inch on the map to a distance you can visualize, like a mile. Use a ruler, compass edge, or string to calculate distances using this scale.
The legend tells you what’s on the map and where it came from. Here’s what you’ll most commonly see.
This circle shows the cardinal directions, so you can rotate your map so that north on the map is oriented toward true north. On most maps, north is at the top. The compass rose is usually located on the edge of the map.
These lines show elevation, and understanding how to read them is key to getting the most out of a topo map. Every point on a single contour line is at the same elevation, and taken together they reveal features like peaks, ridges, valleys, and cliffs.
Contour interval: This is the difference in elevation between contour lines, and it’s always the same on a given map. That is, if the legend says the contour interval is 40 feet, that’s always the elevation difference between lines on that map. So contour lines that are far apart indicate nearly level terrain, while lines that are closer together show steeper terrain. Very tightly grouped lines indicate cliffs. Once you can confidently read contour lines, you can visualize mountains, valleys, and ridges.
Index lines: Every fifth contour line is thicker than the others. This is called an index line and has the elevation written on it. When you know the contour interval and the elevation of an index line, you can determine the elevation of any point on the map. You can also use the index lines to see if elevation is increasing or decreasing, and to quickly calculate the elevation gain (or loss) on a route.
Practice. Sit down with a topo map of a familiar area and match the terrain features to the map. Identify peaks, ridgelines, and saddles on the map and then spot them on the ground.
Count the contours! If you’re looking at a summit and want to know how much vertical gain to expect, start at the contour line on which you're standing, or a nearby landmark (valley floor, turn in trail, etc.), and count the lines up to the summit. Then multiply the number of lines by how many vertical feet the contour line represents.
Your map’s scale can help you estimate distance. Use a finger knuckle, compass edge, scrap of paper, or piece of string (measuring tool) to measure the scale. Then lay your measuring tool on the map, and count how many times the length of the scale fits on your intended route. Multiply this number by the distance represented by the scale.
Ready for some off-trail adventures? Use a map to chart new off-trail routes by noting paths of least resistance in trailess backcountry terrain. Use the maps’ contour lines to find ridges and/or valleys that could facilitate efficient movement without a trail. Take note of available water sources. As always, travel off-trail responsibly.
All articles are for general informational purposes. Each individual’s needs, preferences, goals and abilities may vary. Be sure to obtain all appropriate training, expert supervision and/or medical advice before engaging in strenuous or potentially hazardous activity.