How To Practice (and Enjoy) Outdoor Yoga

Enjoy the vast benefits of yoga—and of being in nature—all at once with these tips.

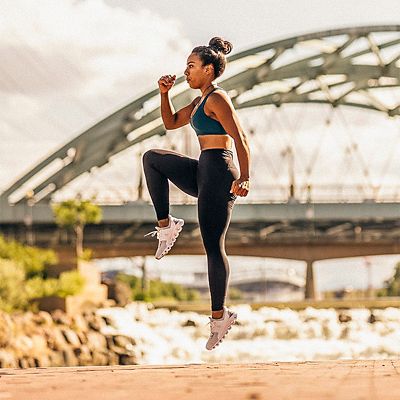
Perhaps you’ve spent a day hiking, running or mountain biking on the trails, maybe even paddling on a lake or river. Your body could use some love, as could your mind. Practicing yoga is a proven way to unwind after a day spent charging outdoors, or to recuperate in camp between more adventurous outings. That doesn’t mean you need to hunt down a yoga studio; it’s more than possible to effectively practice yoga outdoors among the trees and the breeze.

Besides having some knowledge of how to safely do yoga plus the body awareness to not push beyond your limits, all you really need to practice outdoors is a flat space. Depending on the surface, you may opt to use a yoga mat to soften the ground beneath you and maintain your footing (towels and blankets tend to feel slippery; they can also bunch up). A handful of other gear items can increase your comfort. From there, the progression of postures, or flow, that you choose to do may depend on what your body or your mind—or both—are craving based on the activities you’ve been doing. Here’s a guide to help you enjoy outdoor yoga, with tips on how to outfit and prepare along with some recommended poses to integrate into your next open-air sequence.     

SURFACE CONSIDERATIONS 

Grass

There’s a visceral connection to nature practicing yoga barefoot on grass. If you don’t mind the feeling of blades between your toes, do your standing postures barefoot. Once you move to seated postures or any poses on your back, you may want to lie on a mat, towel or blanket to avoid getting wet or becoming itchy.

Dirt

If you’re at a campsite or have a smooth patch of dirt in a backyard or other outdoor space, use it to practice yoga—at least the standing poses—while wearing shoes. Once you move to seated poses, consider using a blanket or towel (if you don’t mind getting dirty). You can also place a yoga mat on top of that towel or blanket for a stickier surface. Just know the balancing poses will be more challenging due to the softer/thicker surface beneath you.

Rock/Concrete/Asphalt

A hard surface of smooth, flat rock like you’d find in certain backcountry campsites in the Sierra Nevada range (oh, the granite) most closely mimics the floor of a yoga studio: smooth, hard, flat. On these surfaces, you’ll want a yoga mat. If you don’t have one, a towel or blanket can suffice, though they can also be slippery or bunch up. Still, they’re better than nothing, at least for seated poses.

OUTDOOR PRACTICE ESSENTIALS

A yoga mat is really the only specific piece of equipment you need for outdoor yoga, and even then, you can get by without one. Level up with a yoga-specific mat towel to increase padding and help you manage any added sweat from being out in the elements. Lightweight, compact travel yoga mats can also come in handy for those on the move who want to take their yoga practice with them, especially outdoors.

You can get creative with props for outdoor yoga: substituting a water bottle for a block; a towel or long-sleeved shirt for a yoga strap; and a pillow, a rolled-up blanket or a camping sleeping pad for a bolster.

Apps, like CorePower On Demand, Glo, or Gaia, can serve you well if you’re doing yoga outdoors near a wireless connection, or offline with a class that you’ve downloaded ahead of time. Place your smartphone, tablet, or laptop on a camp chair, table, tree trunk or the like, and enjoy guidance from a yoga instructor.

POSTURES TO KNOW

Depending on what activity you’ve done that day or in the recent past, your body may be craving certain openers, strengtheners, or poses that help with alignment and balance.

STARTING FLOW/UPPER BACK OPENERS

Mountain Pose: If you’ve been in go-mode all day on a hike, run, ride or paddle, or just traveling to your ideal outdoor spot, standing in mountain pose with your hands at your heart’s center is a good place to ground and start your practice.

Standing Side Bend: From mountain pose, reach your arms overhead and to one side. Doing this pose on both sides of your body opens up your lats and your side body overall, which can feel particularly good for paddlers.

Standing/Baby Back Bend: Returning to mountain pose, move arms overhead, releasing them to 90-degrees bent and perform a gentle back bend to open up the chest—a welcome stretch for those who just spent a lot of time hunched over handlebars looking for the trailhead, or carrying a backpack.

You may want to flow through a sun salutation sequence—forward bend, ragdoll, halfway lift, plank, and upward/downward dog—a few times to warm up further.

STANDING POSES 

Chair Pose: Paddlers of all types may have restless legs after a day on the water. This pose will fire up your glutes and quads. Sit back as if hovering over that suspect campsite outhouse seat. Holding the seated position while keeping your chest elevated builds strength. Doing chair pose with airplane arms will also open the chest and fire up the triceps.

One-Legged Mountain Pose: Balancing on one foot is a nice strengthener for trail runners, in particular. The micro-muscles and connective tissue needed to hold this pose are the same ones needed for stability while navigating obstacles on the trail (or on a standup paddleboard). Runners and standup paddlers alike benefit from this pose on days off from running/paddling or before a run by awakening those muscles and tissues. For mountain bikers and kayakers/canoers (climbers, too), this pose also effectively strengthens what may be underused muscles.

Dancer Pose: This quadricep, hip-flexor, low back, and chest stretch creates a serious balance and strengthening challenge. Runners and mountain bikers could also definitely use the quad stretch. Seated paddlers and bike riders will benefit from the hip-flexor opener—not to mention the chest opening and balancing at work. Hikers and backpackers will appreciate the back-bend motion after being weighed down under a pack.

SEATED POSES

Pigeon Pose: Athletes of all sorts, but especially trail runners and seated paddlers, tend to have tight hips/glutes. Pigeon pose is an especially effective hip opener and glute stretch. Don’t force sleeping pigeon, where you place your forearms on the ground; a simple pigeon pose will provide plenty of stretch.

Bridge Pose: Since this pose stretches abdominal muscles, chest muscles, and shoulders, it can feel like welcome relief for rock climbers. Other athletes will enjoy it as well. Work into bridge pose toward the end of your sequence when you’re ready to be on your back, easing toward your final resting pose.

Supine Twist: The spines of runners, hikers, and mountain bikers take some serious pounding. Find relief by lying on your back, holding one bent leg up to your chest, gently crossing that bent knee over your straight leg, gazing the opposite direction. This pose lengthens your spine, balances out your low-back joints, and can even improve digestion. Be sure to alternate legs, twisting over to both sides.

SAVASANA

This final resting pose is a must for anyone doing yoga—for its calming effect and to let all that linked breath and movement settle into mind and body before moving on with your day. It can be especially welcome for athletes who constantly push the pace and the limits of what their bodies can do. Lie still on your back for as long as you have the time, and soak it all in.

All articles are for general informational purposes.  Each individual’s needs, preferences, goals and abilities may vary.  Be sure to obtain all appropriate training, expert supervision and/or medical advice before engaging in strenuous or potentially hazardous activity.

MORE STORIES