How To Maintain Your Bike’s Brakes

Learn to identify issues, fix problems and improve performance to keep this riding essential functioning well

Brakes are one of the most important parts of any bicycle, and they’re essential for riding safely. To keep them in proper working order, it’s important to understand how they work and know what to do if they get out of whack. No matter how or where you ride, you can only improve your experience by learning more about your bike’s brakes and how to keep them functioning properly.

Brake Types

There are two main styles of bike brake—rim brakes and disc brakes—and several varieties of each. These are the common ones to know.

Rim Brakes

These slow you down by pushing brake pads onto your wheel’s rim near the tire. Rim brakes are affordable and lightweight, and they’re found on all kinds of bikes, including commuter bikes, road bikes, and entry-level bikes. The main drawback: They don’t work as well if your rims get wet or dirty.

Caliper Brakes

These lightweight and powerful rim brakes are popular on high-end road and commuter bikes. Their compact design offers good aerodynamics and stopping power, but they are less effective in wet conditions. They mount with a single bolt on the front fork and on the frame’s brake bridge over the rear tire. 

Cantilever Brakes

These rim brakes have two arms that mount to bosses (studs built into the bike’s front fork and seat stays). The main brake cable attaches to a cable hanger that connects the two brake arms. When you pull the brake lever, the cable pulls the hanger, which brings the arms together and pushes the brake pads into the rim to slow the bike.

V Brakes

Though similar to cantilever brakes, V brakes have longer brake arms that are connected by the main brake cable. The longer brake arms provide more leverage and make cantilever brakes more efficient—they’re often found on mountain and commuter bikes. 

Disc Brakes

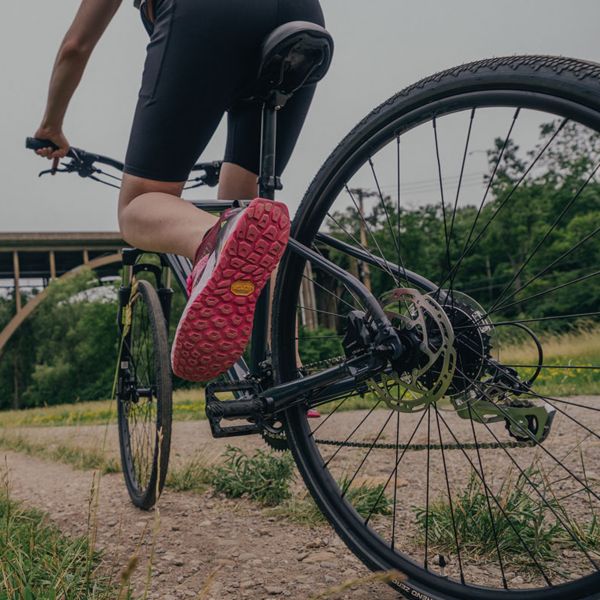
Instead of rubbing against the wheel rim, disc brakes use calipers that squeeze a brake disc (also known as a rotor) mounted near your wheel’s hub to slow the bike down. Disc brakes are often heavier and more expensive than rim brakes, but because the disc is located higher up on the bike than the rim, they work better in dirty, wet conditions and offer strong braking power. While they first gained popularity on mountain bikes, they are becoming the standard in road and commuter bikes as well due to their power and reliability. 

Mechanical Disc Brakes

Like rim brakes, mechanical disc brakes are cable-actuated: The brake lever pulls a cable to squeeze the calipers. These are more affordable than hydraulic disc brakes, but they require more frequent adjustment of cable tension as heat and brake-pad wear change the cables’ tension.

Hydraulic Disc Brakes

Hydraulic disc brakes use tubes of hydraulic fluid to activate the calipers and press the pads against the rotor. These are more powerful and more reliable than mechanical disc brakes. They also work better with prolonged use, handling the high temperatures of brake friction better than cable brakes and self-adjusting as the brake pads wear down. On the downside, they’re more difficult to service and more expensive than mechanical disc brakes. 

How To Check Your Brakes

Before you ride, spin each of your bike’s wheels to make sure they rotate without rubbing against your brake pads, which steals precious pedal power (aka wattage). Then pull both brake levers, one at a time, to be sure they feel firm—meaning the pads are gripping the rim or rotor properly—and not “doughy.” If the brakes are rubbing or the lever feel isn’t right, adjust your brakes by following the maintenance and repair strategies below.

Adjust Brake Rubbing

If you hear your brakes rub during a pre-ride check, or while riding, it's time for an adjustment. 

Disc Brakes: Rubbing happens if your caliper is off center. Make sure your wheel is properly mounted, and then partially unscrew the bolts that mount the brake to the bike frame. Squeeze your brake lever, which will recenter the calipers around the rotor, and then retighten the brake mounting bolts.

If the brake continues to rub, your rotor might need to be straightened out or “trued.” Have a professional bike mechanic do this job. 

Rim Brakes: First, make sure the pads are set equidistant from the rim so you get effective braking from both sides. If the brakes aren’t centered (where one pad contacts the rim before the other), adjust the brake’s centering screw to space the pads equally. 

Apply your brakes and see how the pads sit on the rim. If necessary, loosen the brake pad mounting bolts and adjust the pads so they make full contact with the rim (and no part of the pad juts off the rim) when you pull the lever. If your brakes squeal, consider “toeing” them in; adjust each pad so that the part of the pad toward the front of the bike makes contact slightly before the rear of the pad. 

Fixing Weak Brakes

If your brakes feel exceedingly tight, underpowered, or “doughy,” where you pull the brake lever and it takes a while for the brake to engage, you’ll need to adjust them. 

Rim and Mechanical Disc Brakes: Start by manipulating the barrel adjuster. This small, barrel-shaped adjuster is located on the brake cable where it enters the brake lever on the handlebars. Loosening the barrel adjuster (by spinning it counter-clockwise) will tighten your brake cable and correct an underpowered or doughy lever feel. Tightening the barrel adjuster (by spinning it clockwise) will loosen your brake cable to correct an exceedingly tight lever feel. Only use the barrel adjuster for minor adjustments. 

If your braking needs larger adjustments, loosen the bolt that secures the brake cable at the brake caliper, and increase or decrease the slack on the cable as needed. Once adjusted, be sure to tighten the bolt down carefully. 

Hydraulic Disc Brakes: It might be time to bleed your brakes. This is a tricky operation as changing the fluid requires being certain you don’t get any air in the lines, plus the fluid itself is highly caustic. You’re better off seeking professional help for this job.

Brake Pad Maintenance

Investigate your brake pads after a ride to be sure they do not have any dirt or rocks embedded in them. For disc brakes, this may require a flashlight in order to see the pads inside the brake housing (you can also remove the pads to inspect them). 

If your brake pads, rim or disc, are dirty, clean them with an alcohol-based product like acetone and a small brush. If they are “glazed,” when the exterior hardens after overheating, rub the pads with a file or light sandpaper until you can scratch the pad with your fingernail.

Replacing Your Brake Pads

For rim brakes, check the wear lines on each of the pads. If a pad has worn down to the line, it’s time to replace it.

Checking pad life on disc brakes is more difficult because they are much thinner and harder to access than rim brake pads. You can check with a measuring caliper, but it may be easier to just use your senses. If you feel your braking power has decreased, or you hear a metal screech or howling when braking in dry conditions, it’s time to change your pads. It’s also better to replace pads early; if you wait too long, the metal behind your pads will scrape your rotor and damage it. 

All articles are for general informational purposes.  Each individual’s needs, preferences, goals and abilities may vary.  Be sure to obtain all appropriate training, expert supervision and/or medical advice before engaging in strenuous or potentially hazardous activity.

MORE STORIES